The Complete Guide to a Home Cold Plunge Setup on a Budget
Quick Answer: Three practical tiers exist. A bathtub with ice costs nothing upfront but runs $3 to $8 per session in ice and takes 15 minutes to prepare. A stock tank or inflatable tub with bagged ice costs $80 to $250 upfront and suits 2 to 4 sessions a week. A tub plus a chiller costs $800 to $2,500 and makes daily use effortless. For most people starting out, the middle tier is the right answer - and from October to April in a cool climate, ambient air does much of the chilling for free.
The expensive part of cold plunging is not the water. It is the convenience, and how much you are willing to pay to remove friction from a habit you have not yet built.

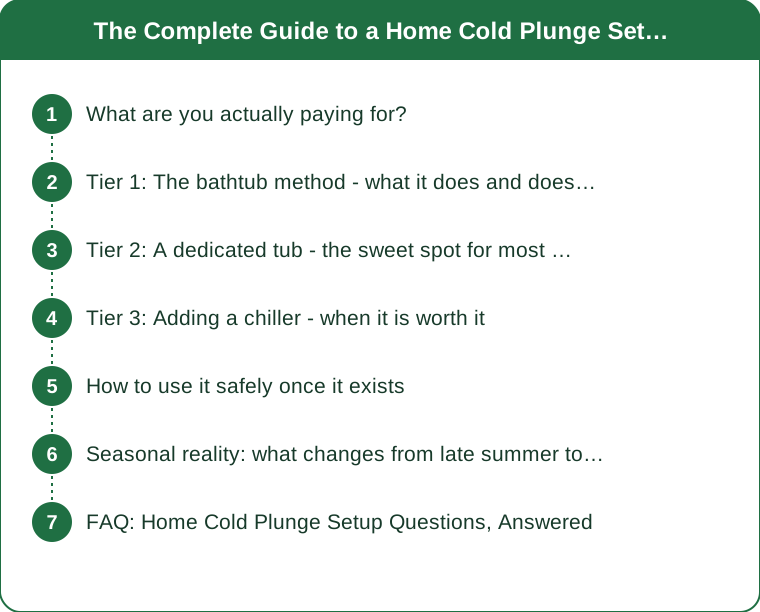
What are you actually paying for?
Three things, and it helps to price them separately: cold, volume, and convenience.
Cold is the cheap part in winter and the expensive part in summer. Water needs to sit somewhere between 10 and 15°C (50 to 59°F) for a typical plunge - colder is not better for beginners, and most of the documented benefits sit in that range rather than at extremes. In a cool climate from October onward, outdoor water sits near that range unaided for months. In August, you are fighting a 20-degree gap with ice, and that gap costs money every single session.
Volume decides how much cold you need to buy. A standard bathtub holds roughly 150 to 200 litres. A 100-gallon stock tank holds about 380 litres. Bigger tubs are more comfortable and hold temperature longer, but they need proportionally more ice to bring down from warm. A smaller tub you actually use beats a larger one you fill twice a month.
Convenience is what you are really buying with a chiller. A chiller does not make the water colder than ice does; it makes it cold all the time, with no preparation. That is worth a lot if you plunge daily and almost nothing if you plunge on Saturdays.
Insulation is the cheapest performance upgrade. An insulated lid and a foam wrap on a stock tank can hold temperature overnight, cutting ice use dramatically. A $40 insulated cover often saves more ice cost in a season than it cost to buy.
And there are hidden running costs on the top tier: a chiller draws power continuously, typically $15 to $40 a month depending on ambient temperature, insulation, and local rates - plus filtration and water treatment. Budget for those before you buy, not after.
Tier 1: The bathtub method - what it does and does not do
The zero-equipment version, and the right place to start if you have never plunged.
How it works: fill the bath with cold tap water, add ice, wait for it to equilibrate, check the temperature, get in. In autumn and winter, cold tap water is often already 10 to 15°C in cool climates, which can mean little or no ice at all for months of the year.
Ice requirements in warmer months: bringing about 180 litres from 20°C to 12°C takes roughly 10 to 15 kg of ice. At typical bagged-ice prices that is $5 to $8 a session, which is why summer bathtub plunging gets abandoned quickly.
The real advantages: no purchase, no storage, no maintenance, no water treatment, and you can stop after two weeks if you decide it is not for you. Most people who buy expensive equipment first would have learned the same thing for free here.
The real disadvantages: 15 minutes of setup per session, an occupied bathroom, and a tub that drains after every use. Friction is the enemy of habit, and this tier has the most of it.
Make it work better: freeze water in reusable containers - large plastic bottles or ice cream tubs - rather than buying bags. They are free after the first fill, they last longer than loose ice because of the lower surface area, and you simply refill and refreeze them. A chest freezer with a dozen 2-litre bottles is the poor man’s chiller and it works genuinely well.
Use this tier for at least four weeks before spending anything. If you are still doing it after a month, you know the habit is real and you can buy accordingly.
Tier 2: A dedicated tub - the sweet spot for most people
This is where most home setups should land, and it is far cheaper than people expect.
Options and rough costs: a galvanized stock tank runs $80 to $200 and lasts years outdoors. An inflatable or barrel-style plunge tub runs $100 to $250, packs away, and suits balconies and small yards. A chest freezer conversion is popular online but requires real electrical care and voids warranties - it is not a beginner project and the safety margin is thinner than the videos suggest.
Why it beats the bathtub: the water stays in it. That is the entire argument, and it is decisive. No filling, no draining, no occupied bathroom - you walk outside, remove the lid, and get in. Removing preparation time is what converts an interesting experiment into a habit.
Where to put it: outdoors, shaded, on a level hard surface, close to a door. Shade matters enormously in warm months - direct sun can add several degrees a day. Proximity to the door decides whether you use it in November, which is the month that separates people who plunge from people who own a tub.
Insulate it properly. A fitted insulated lid, plus foam board or a purpose-made jacket around the sides, holds cold overnight. Without insulation you are re-icing daily; with it, twice a week may be enough in cool weather.
Water maintenance is the part people skip. Standing water needs treatment. Options are a small filter pump with a chlorine or bromine dose kept low, hydrogen peroxide dosing, or simply draining and refilling every 1 to 2 weeks. Cold water slows bacterial growth substantially but does not stop it - and cloudy or smelly water means change it now, not next week.
Total realistic first-year cost: roughly $150 to $400 including tub, cover, insulation, thermometer, and basic treatment. That is a rounding error against a chiller setup, and it covers 90% of the benefit.

Tier 3: Adding a chiller - when it is worth it
The expensive tier, and it earns its keep only under specific conditions.
What a chiller does: it circulates and refrigerates the water continuously, holding a set temperature - usually adjustable down to around 3 to 5°C. Many units also filter, and some include ozone or UV sanitation.
What it costs: entry units start around $800 to $1,200, mid-range with filtration runs $1,500 to $2,500, and integrated tub-and-chiller systems go well beyond that. Add $15 to $40 a month in electricity, more if the tub is uninsulated or in full sun.
When it makes sense: you plunge 4 or more times a week, you live somewhere warm where ambient temperatures never do the work for you, you are spending more than about $40 a month on ice, or you value the zero-preparation aspect enough to pay for it directly. The break-even against bagged ice is roughly 18 to 30 months for a frequent user in a warm climate - and never, for someone plunging twice a week in a cool one.
When it does not: you are in the first six months of the habit, you live somewhere where outdoor water sits near target temperature half the year, or you plunge inconsistently. A chiller does not create consistency; it rewards consistency that already exists.
Sizing matters. A chiller rated for a 300-litre tub in a 20°C environment will struggle with a 400-litre tub in full sun. Check the rated cooling capacity against your tub volume and your typical ambient temperature, then insulate to close the gap.
And do not skip the electrical basics. Outdoor water plus mains electricity requires a properly rated outdoor circuit with RCD/GFCI protection, ideally installed by an electrician. This is the one corner of the project where cutting costs is genuinely dangerous.
How to use it safely once it exists
Equipment is the easy part. Protocol is what keeps this useful rather than risky.
Start warmer and shorter than you think. 15°C (59°F) for 1 to 2 minutes is a legitimate starting point. Colder and longer is not better, and the evidence for benefits does not require extremes. Build over weeks.
The realistic working range: most regular users settle at 10 to 15°C for 2 to 5 minutes, two to four times a week. Total weekly cold exposure of around 11 minutes is a figure that circulates in the research discussion, and it is a reasonable target rather than a rule.
Control your breathing first. The cold shock response - an involuntary gasp followed by rapid breathing - peaks in the first 30 to 60 seconds and is the genuinely dangerous phase. Enter slowly, exhale as you go in, and focus on slow breathing until it passes. Never enter cold water by jumping.
Never plunge alone in a deep tub, and never after drinking alcohol. The combination of cold shock and impaired judgment is how the rare serious incidents happen.
Get out on a schedule, not a feeling. Shivering that continues after you exit is normal; numbness, loss of coordination, or confusion is not - those mean out immediately and warm up gradually. Use a timer rather than trusting your own sense of duration, which cold distorts.
Rewarm passively. Dry off, put on warm layers, and move gently. A hot shower immediately after is comfortable but blunts some of the adaptive response, and rapid rewarming can cause an uncomfortable blood pressure drop. Give it 10 to 15 minutes before hot water.
Time it around your training. Cold immersion soon after strength training appears to blunt some hypertrophy adaptation, so leave 4 or more hours after lifting, or plunge on rest days and after endurance sessions where recovery is the priority.
Seasonal reality: what changes from late summer to winter
The economics of home cold plunging flip completely twice a year, and planning around that saves real money.
Late summer is the hardest and most expensive stretch. Ambient temperatures in the twenties mean tap water arrives warm and every degree of cooling is bought with ice or electricity. This is exactly when most people give up, concluding it is unaffordable - when in fact they have only experienced the worst two months of the year.
Autumn is when it becomes almost free. As nights cool, an insulated outdoor tub drifts naturally toward the target range. From roughly October through April in a temperate climate, ambient air does the chilling. If you are setting up now, you are entering the easy season, which is the best possible timing for building the habit.
Deep winter brings the opposite problem: too cold. Water below about 5°C shortens safe duration substantially and, in freezing conditions, can damage tubs and plumbing. An insulated cover, a floating de-icer or a small pump to keep water moving, and shortened sessions all help. Colder is not a bonus - reduce your duration accordingly.
Adaptation is seasonal too. Cold tolerance built over autumn carries into winter, which is why starting in September is far more pleasant than starting in January. The gradual seasonal drop does the progression for you.
Water changes need seasonal thinking. Cold water stays clean longer, so winter maintenance is lighter; summer needs more frequent changes or more active treatment. Plan for a full drain and clean at each seasonal turn, which conveniently coincides with when you would be adjusting the setup anyway.
And revisit the chiller question in spring, not autumn. If you have plunged consistently through a whole winter using nothing but ambient cold, you will know by April whether the habit justifies the equipment - and you will have a full season of evidence rather than a hopeful guess.
FAQ: Home Cold Plunge Setup Questions, Answered
How cold does the water actually need to be?
Most protocols use 10 to 15°C (50 to 59°F). Beginners do well starting at the warmer end for short durations. Colder water shortens safe duration rather than improving results.
How often do I need to change the water?
With a filter and light sanitation, every 3 to 4 weeks is typical in cool weather; without treatment, every 1 to 2 weeks. Change it immediately if the water is cloudy, smells, or has visible growth - and always after anyone gets in with an open cut.
Is a chest freezer conversion safe?
It can work but involves sealing an electrical appliance against water, which carries real electrocution and fire risk if done badly. It voids warranties and is not recommended unless you genuinely know what you are doing with the electrical side.
Do I need a chiller if I live somewhere cool?
Usually not for most of the year. From autumn through spring in a temperate climate, an insulated outdoor tub holds a usable temperature on its own. A chiller mainly buys you summer consistency.
Who should not cold plunge?
People with cardiovascular conditions, uncontrolled high blood pressure, arrhythmias, Raynaud’s, or who are pregnant should check with a doctor first. Never plunge alone, after alcohol, or immediately after a very hard session if you feel unwell.
This is general information, not medical advice. Talk to a healthcare professional before starting cold water immersion if you have any underlying health condition.
TL;DR:
- Start with a bathtub for four weeks before spending anything - it costs nothing and tells you whether the habit is real.
- The sweet spot is a stock tank or inflatable tub plus an insulated cover, $150 to $400 all in, for 2 to 4 sessions a week.
- A chiller ($800 to $2,500 plus $15 to $40/month) buys convenience, not results - worth it at 4+ sessions a week in a warm climate.
- Target 10 to 15°C for 2 to 5 minutes, enter slowly, use a timer, never plunge alone, and rewarm gradually.
The single most useful thing to know is that you are setting up at the right time of year: from autumn onward, ambient air does most of the chilling for free, and the habit you build over the easy season is the one that survives next summer - which is when you will actually know whether a chiller is worth it.
Keep Reading
This article is for general informational purposes only and is not medical advice. Always consult a qualified health professional for guidance specific to you.